How to set up your DKIM, SPF, and DMARC
In order to configure SPF, DKIM and DMARC records correctly, you should refer to the steps outlined in the Google Workspace Admin Help.
These are the instructions you can follow:
- Set up SPF for the domain.
- Set up DKIM for the domain.
- Set up a mailbox for reports.
- Get the domain host sign-in information.
- Check for an existing DMARC record (you can use MxToolbox here).
- Change DMARC policy.
You must correctly set up DKIM, SPF, MX, and DMARC initially and make any subsequent changes in the correct order.
All domain providers, including Google, have their own individual settings. However, the settings for each domain can be altered according to the user's preference.
- You need to go to your DNS settings (e.g., Namecheap, Cloudflare, Bluehost, etc.) and create a new record.
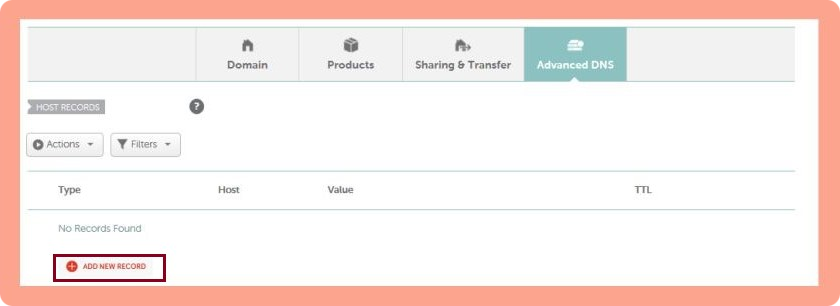
- Select TXT record and enter “@” in “Name.”
- Paste “v=spf1 include: _spf.google.com ~all” in “Value” and then save.

These steps are for the admin who manages Google Accounts at your company:
- Sign in to your Google Admin console.
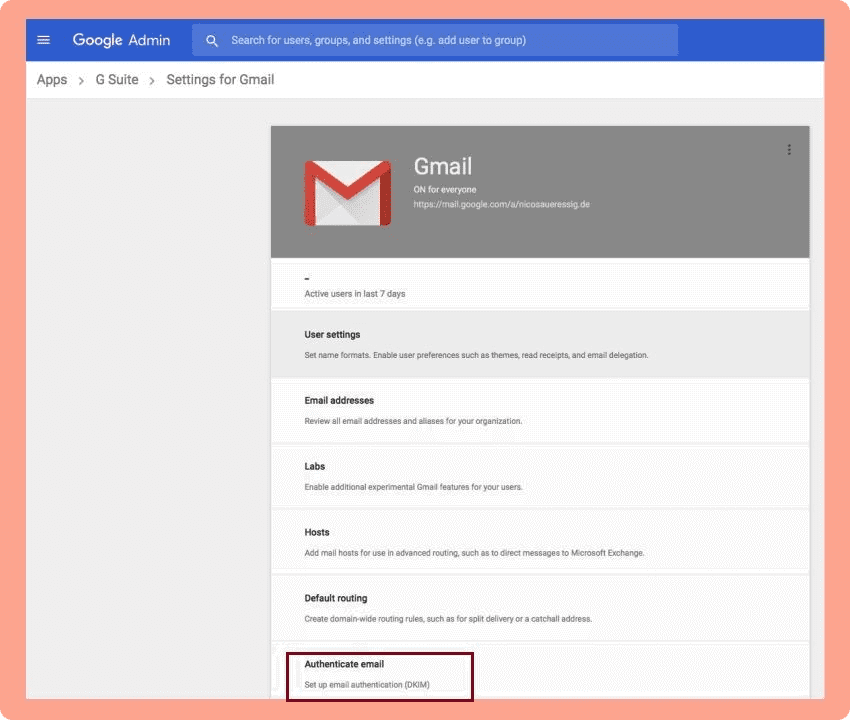
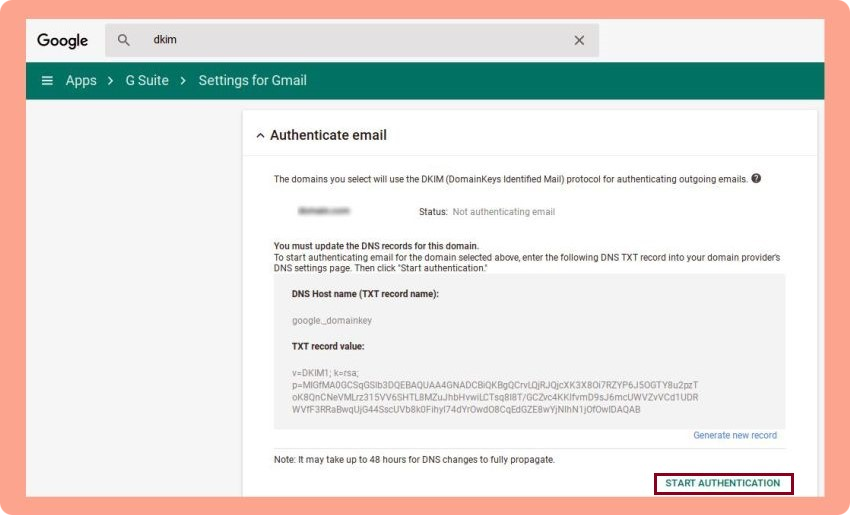
- Click on the top left menu and head to Apps > G Suite > Settings for Gmail > Authenticate Email.
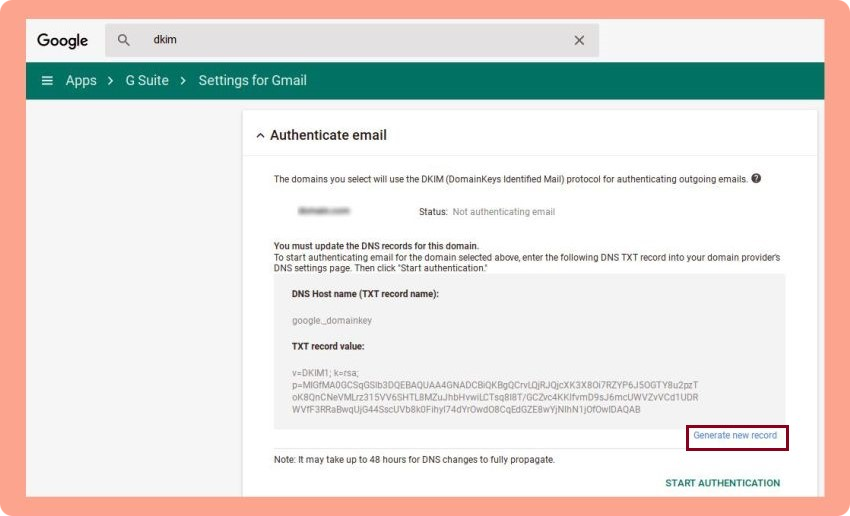
- Pick your domain from the drop-down list, click “Generate New Record,” and then copy the hostname and the TXT record value.
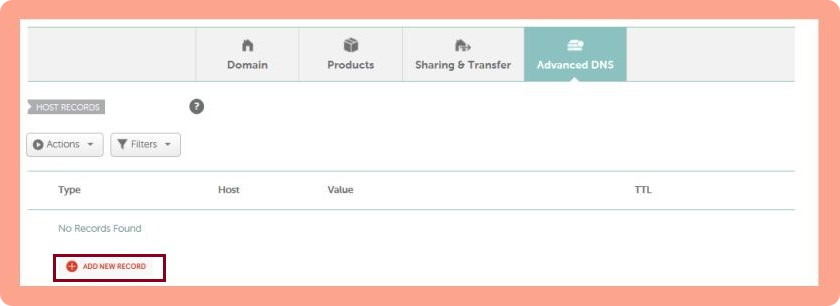
- Log in to your DNS (e.g., Namecheap, Cloudflare, Bluehost, etc.), go to the domain list, choose your domain, and pick “Add New Record” in the advanced settings.
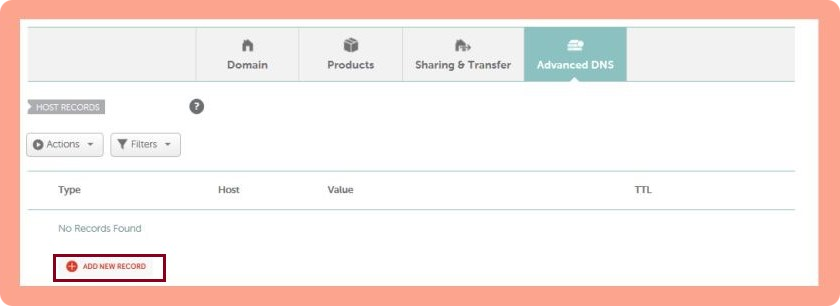
- Select TXT record and enter the hostname you’ve just copied from Google in “Name” and TXT record value in “Value.”

- Save your changes.
- Go back to Google and simply click “Start Authentication.”
- Wait for the DNS to update
General DMARC setting:
DMARC can be added to your DNS records (e.g. Namecheap, Cloudflare, Bluehost, etc.) via a single line of code.
Before setting it, make sure you’ve configured SPF and DKIM records for the required domain.
Then follow these steps:
- Go to your DNS settings and create a new record.
- Choose a ‘TXT’ record.
- Add the hostname (for example, _dmarc).
- Add the value. You can find a sample DMARC entry that you can use to create your own below:
| v=DMARC1; p=quarantine;
rua=mailto:example@domain.com;
ruf=mailto:email@domain.com; fo=s
Where:
v — A mandatory tag-value (don’t change it!).
p — Mail processing policy. One of the possible options is specified — none, quarantine, or reject.
rua – Email address for receiving statistical reports. The address must belong to the same domain for which the DMARC record is configured.
ruf — Email address for receiving reports on failed authentication checks. Since each error when verifying the sender’s address generates a separate report, it’s better to have a separate mailbox for this.
fo — Determines in what cases reports will be sent to the domain owner. Possible values include:
0 — a report is sent if SPF and DKIM checks fail. Set by default.
1 — a report is sent if one of the checks fails — either SPF or DKIM.
d — a report is sent for each DKIM verification performed.
s — a report is sent for every SPF check performed.

